Scanline and Raytracer Graphics

Coded in C++/OpenGL | September - December 2014
As part of an introductory course in graphics, I learned how to make scanline images in OpenGL and images using a raytracer written in C++. Each week we either created a new image or made improvements to a previous one by applying new concepts we learned. Here you can see the progress I've made from a simple 2D image using OpenGL primitives to complex 3D models done in Blender.
As part of an introductory course in graphics, I learned how to make scanline images in OpenGL and images using a raytracer written in C++. Each week we either created a new image or made improvements to a previous one by applying new concepts we learned. Here you can see the progress I've made from a simple 2D image using OpenGL primitives to complex 3D models done in Blender.
Scanline Image
Week 1During our first week, we were introduced to OpenGL and drawing primitives such as triangles, as well as coloring and scanline rendering. I decided to create a Pikachu, which consists of several polygons. The image accepts keyboard input -- upon pressing 'Space', an apple of a random size, color, angle, and position appears in the background. Each time a new apple is created, all the other ones rotate.


Week 2
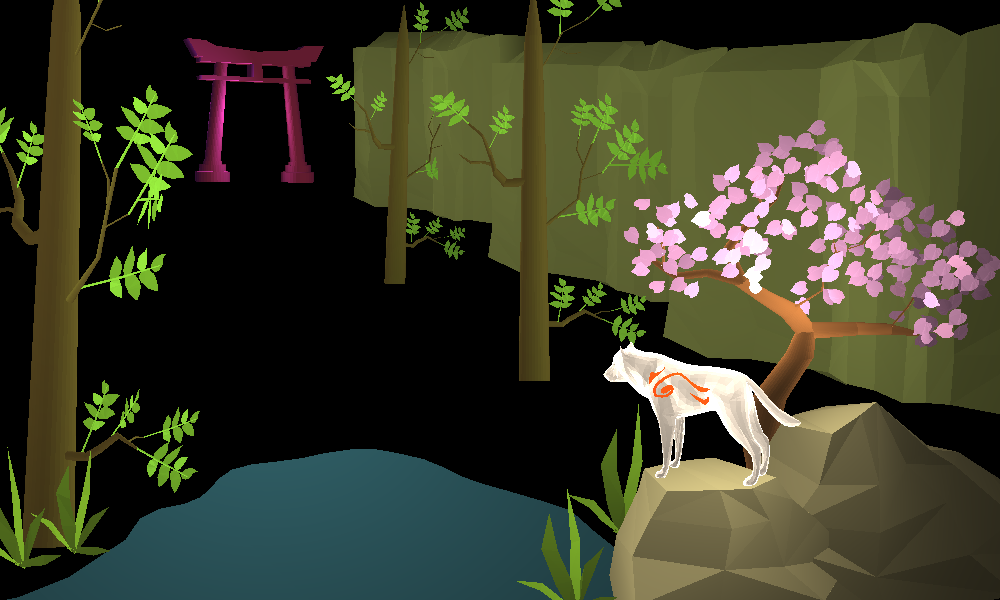
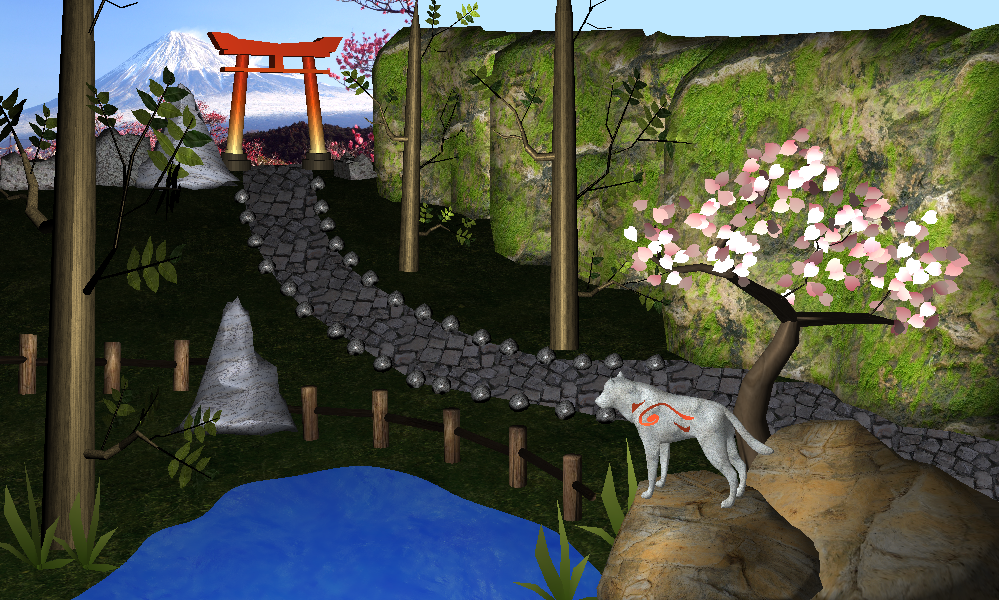
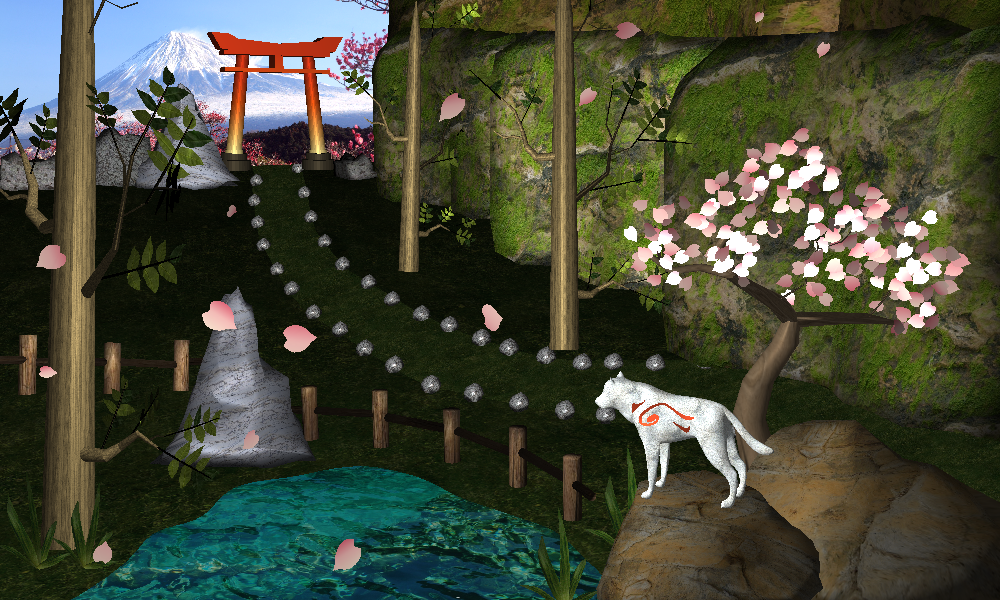
In this week, we learned about geometric modeling. I used Blender the first time to create 3D models, and learned how to use lights to adjust the lighting of a scene. I also learned about shading and the Phong reflection model to apply colors to the scene. I decided to base my scene on a Playstation 2/Wii video game called Okami.
Week 3
After learning about texturing, normal mapping, and displacement mapping, I was able to make the image look much better and more realistic. I added a lot more objects to the scene after creating them in Blender.
Week 4
This week was spent polishing the image. I changed some textures to improve the scene, and added and moved around some objects to hide seams. I adjusted the material properties of some textures as well to make the scene slightly brighter.
Raytracer Graphics
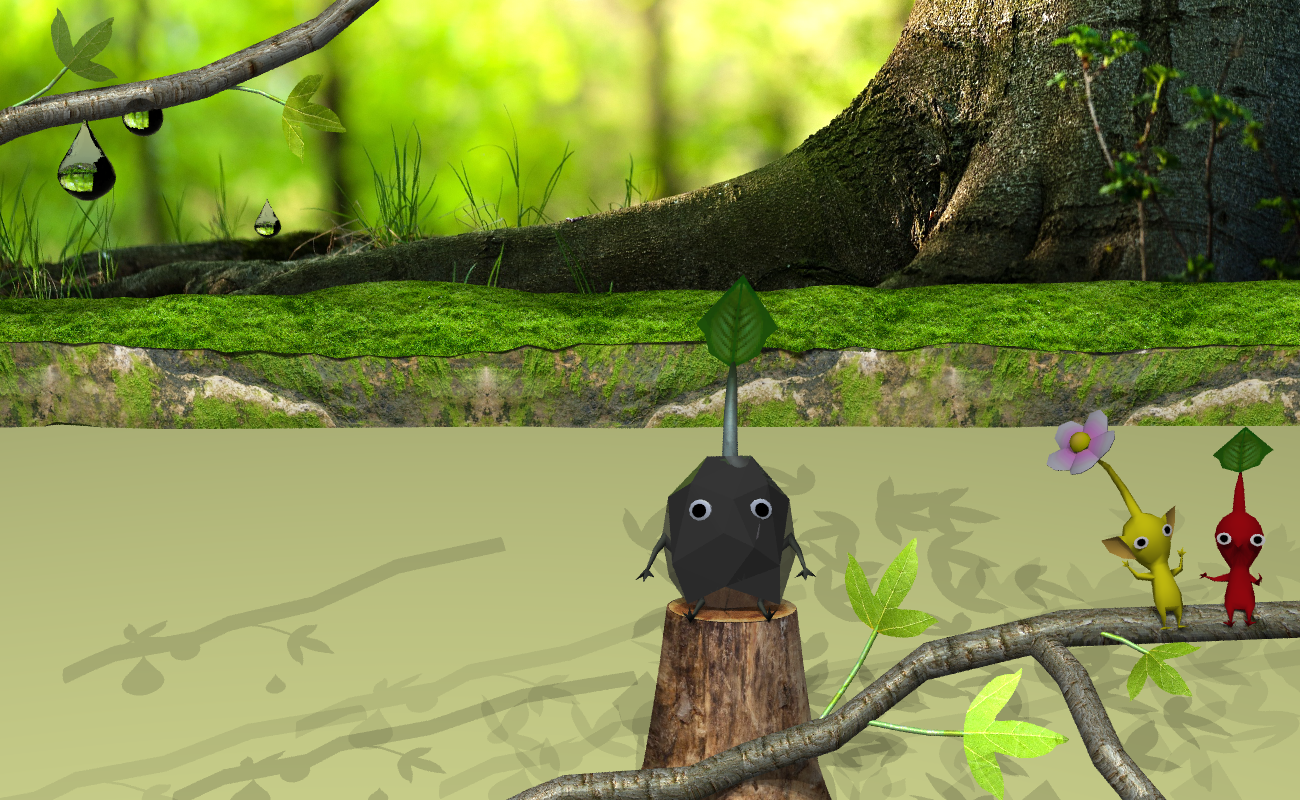
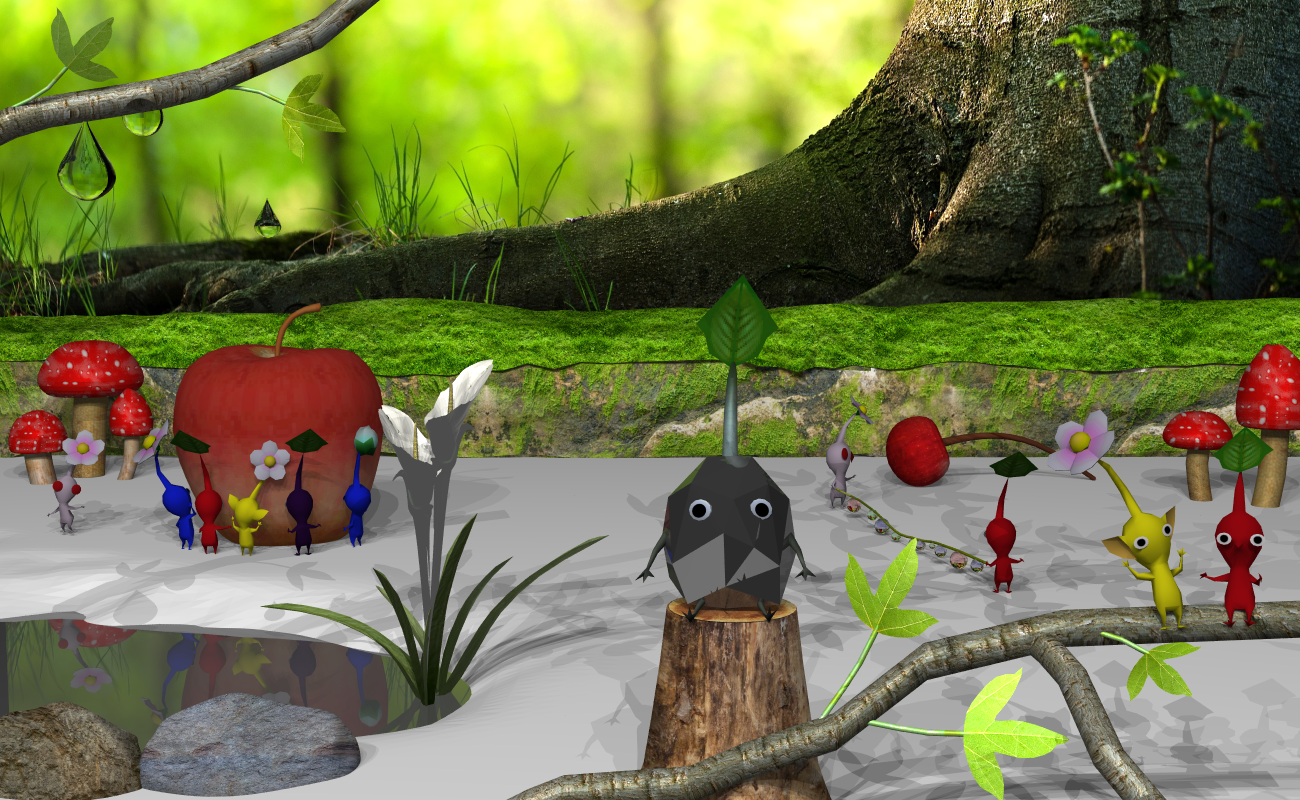
Week 7This week we were introduced to raytracing and learned about shadows, reflection, and refraction. I began implementing a scene from Pikmin, a video game by Nintendo. The shadows still look a little weird and need some work and the lighting needs fixing.
Week 8
After learning about acceleration structures and sampling, I applied them to my image. I used an AABB tree because my image has many clusters of objects (instead of a uniform grid which works better for images with a more uniform spread of objects). I used a sampling rate of 4 for this particular image to get rid of aliasing, and also added a bunch more objects.
Week 9
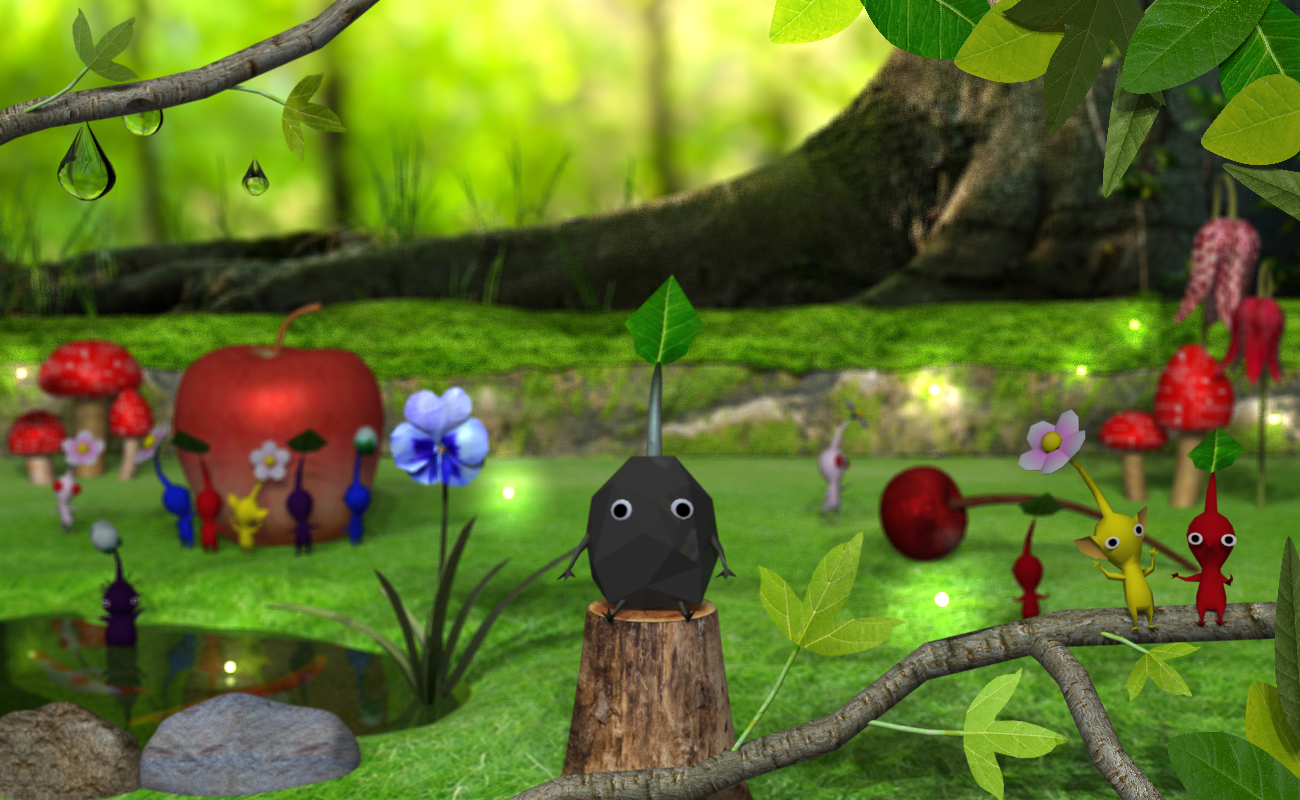
This week we learned about camera effects, including depth of field and participating media. I added both of these to my image. The depth of field help give the background a sort of blurred look, and participating media was used to give the glow of the fireflies.
Week 10
The final week of class was just polishing up the image. I made the scene darker so it would look more like a forest floor and the fireflies can stand out more. I also adjusted some objects and textures so they would look better.
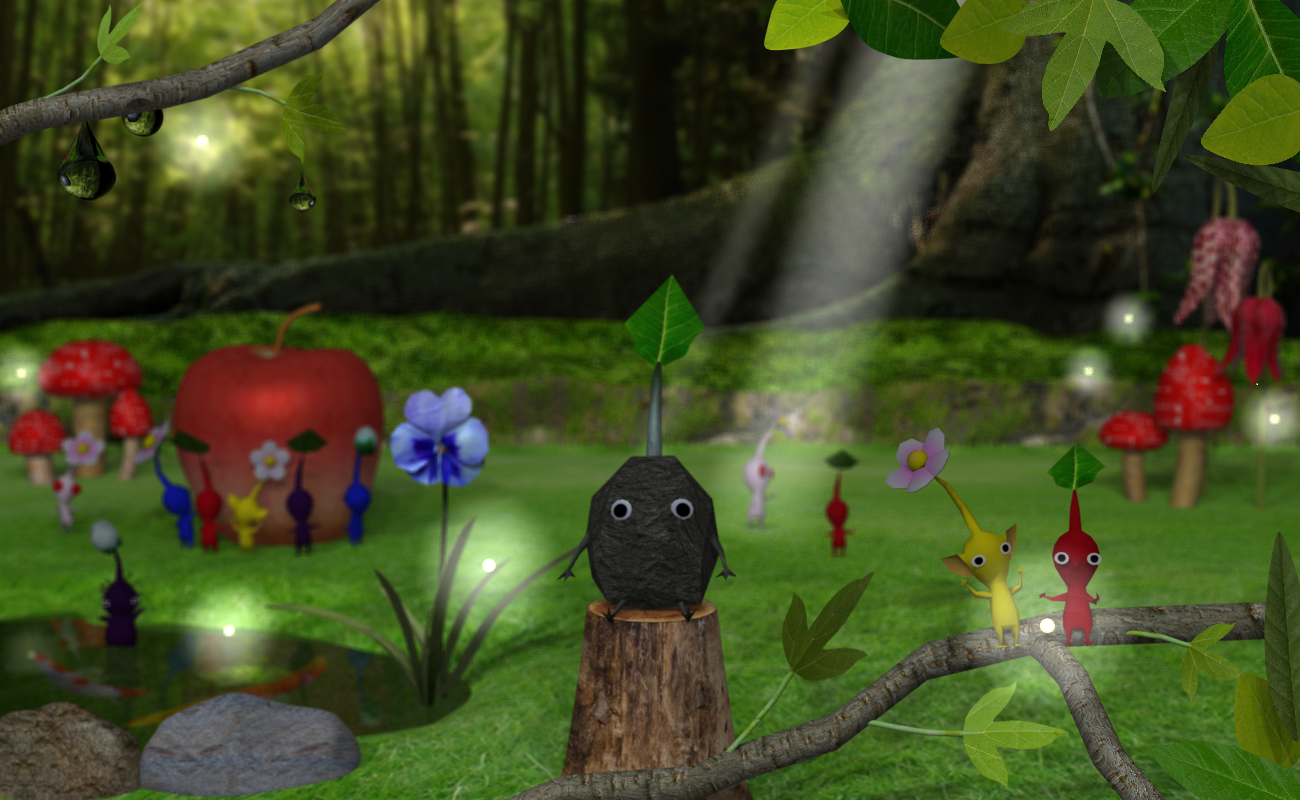
My image was inspired by a series of video games called Pikmin and I wanted to recreate its realistic, nature-y style. I found models for the Pikmin, apple, and flowers online but created everything else in Blender and applied textures in Blender as well. The background image is composed of a large tree and smaller trees in the distance, which I combined using Photoshop. The water droplets (upper left) and the lake are simple objects with a refractive/reflective material applied in the raytracer. The lake is semi-transparent with fish swimming within. The fireflies and shafts of light were created using participating media and by modifying the code such that instead of attenuating light, it adds a layer of light on top. The fireflies were created using a white sphere and centering a smoke sphere on it to give it a glow effect. I wrote a script in C++ to generate the volumetric data for the light streams (which are skewed cylinders), using logarithmic decay for fading. I also tried to get a dappled light effect on the ground by placing many leaves above the scene and directing the light sources downwards through the leaves (although this effect isn’t quite visible...). Finally, I turned on depth of field with a sampling rate of 36.